Transcript
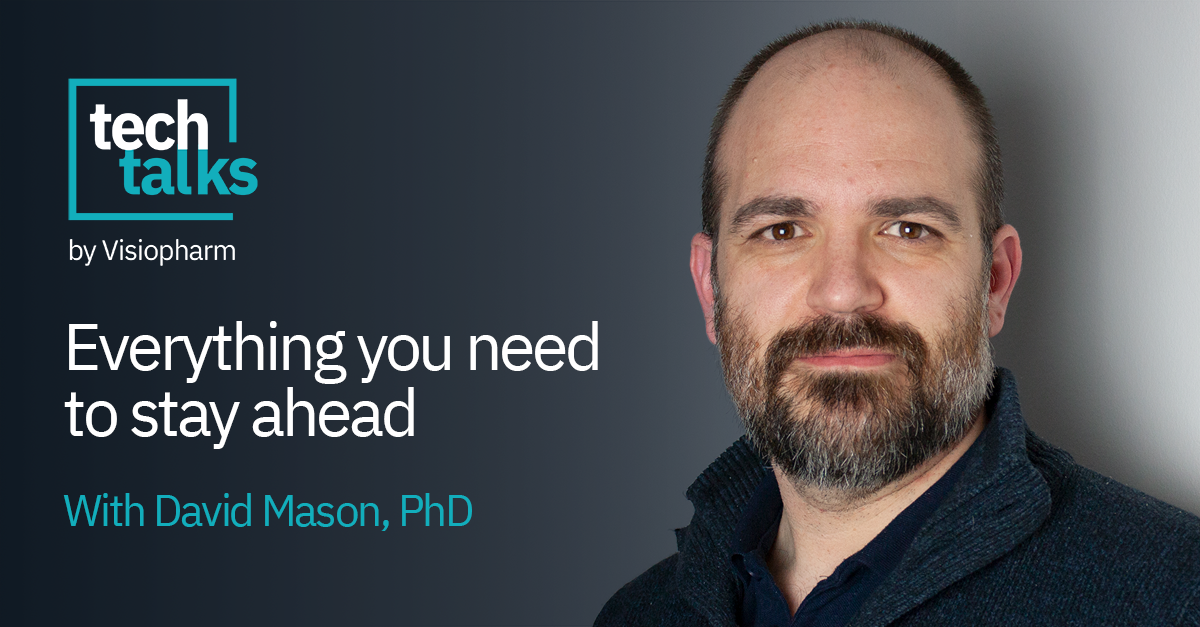
Hello everybody, I’m Bettina Winkler from Visiopharm and I would like to welcome you to today’s Tech Talk webinar. During this series, we want to show you new features in the software and tips and tricks on how to achieve your goals. We very much invite you to drop questions in the chat. We will go through those after the presentation and answer as many as possible. Today, we have David Mason with us, our global director of technical sales. So, let’s head over to the presentation. Over to you, Dave.
Perfect. Okay. So thank you all for joining the Tech Talk. If you missed last time’s Tech Talk, you can always go on our website.
So if you go to visuform.com and then click on the Resources button up at the top there, you’ll be able to see a whole bunch of different posters, webinars and including the other videos. So from my colleague, Dan Winkowski, where he went into a bunch of different topics that were driven directly by you. This tech talk will also be updated there once we’ve finished the talk today and tied it up and answered some questions.
So do feel free to go back there and rewatch these resources.
So with that said, thank you to so much for everyone who during the registration process and after the tech talk last time actually submitted questions and gave us feedback, gave us ideas of topics that you’d like to see. And we hope to continue this, I think, in further tech talks, really feeding off your interests and your areas that you’d like to learn a little bit more detail about. So as a result, today it’s going to be just a quick reminder of the what’s new features in Visiopharm. And then a lot of people were asking about a reminder of overlays in Visiopharm and how they look directly in the software. So I’m going do a little bit of a recap on the three main types of overlays, two that most people here are probably familiar with, and then one more that maybe fewer people are familiar with, give you some use cases for those and show you how you can use them in a couple of workflows.
The other thing we hear a lot of questions about is actually how do we build membrane aware apps?
Most people are familiar with the quick start apps that Visiopharm has where we can do a nucleus detection and then a controlled dilation of that particular label to create a pseudocytoplasm.
These days though, that’s not really enough for a lot of people. People are building more complex panels. They want to start using membrane markers in order to identify where the true boundaries of the cells are, not just a pseudocytoplasm. The annotations for this can be a little more complex, so I’m just going to again jump into software towards the end of this session and then show you some best practice, I guess, for creating these annotations and then some things in the apps that you may want to use.
And then hopefully we have some time for Q and A at the end, so please don’t forget to put your questions in the chat as we go and then we should be able to answer those. So without further ado, just a reminder that when you open up the Visiopharm software, the best way to get the latest release notes and product updates is right there in the software. So you can click on the what’s new button and that will take you to the website which you can also find just going to visiopharm.com and then you have a whole list of all of the production release updates.
This is new features, bug fixes, various of the quality of life updates. And we’ve also taken the trouble to make a little video to go into a bit of a deep dive into some of these features and try to apply more application specific analysis onto that. I would recommend going and checking out those buttons.
So with that said let’s jump into software and then start to talk about overlays.
Now with Visiopharm as I said most people are familiar with the three main types of overlays that we have or at least two of them. We have ROIs.
Remember, you can use these nice keyboard shortcuts to define different ROIs and then labels.
Now, one of the most, common misconceptions when you start to draw these different ROIs and labels is that there’s some sort of hierarchy of these structures. And actually in Visiopharm, you know that’s not true. So if we would remove number two for instance, there is no underlying area that is ROI one this green ROI here. Any pixel is mutually exclusive for any one ROI and also any one label so here you can only allocate one to each.
Now actually this makes a lot of sense when we consider how ROIs are used in Visiopharm and that is to say to identify regions for analysis.
So for instance if we take this mouse brain example here we might decide to draw the cortex in green over here and the cortex in green over here and then we may decide that the hippocampus should be blue but all structures that are hippocampus will probably be the same color.
In the oncology field, I see from the poll many people are working in oncology. Here this could be tumor versus stroma, it could be tumor versus stroma versus necrosis. There are many different applications that you can use.
Now with that said, there’s a third type of annotation that we can use or the third type of overlay sorry called annotations. You may not have really explored the use of annotations maybe you’ve used them in sort of a classic markup way just to use lines or even drawing lengths here to measure distances manually across tissues these kinds of things. It’s a bit like a digital marker pen on the slide.
But actually annotations can be used for many other things during your workflows. Just to give a couple of examples here of how they’re different it’s worth pointing out that unlike ROIs, unlike labels, annotations actually can be overlapping. Here you can see two annotation one and annotation two and annotation three that can all sit overlapping onto these.
So here these actually provide a really useful application for different workflow steps.
So for instance if I just open up a quick couple of quick examples you can see here that we have a HER2 fish example that’s been run and if I just turn off the annotations here you may look at this particular image and you know these cells over here on the side you may think well have they been excluded actively or are these actually missed?
It’s unclear whether or not they’re ever detected in the first place. So what we can do in fact is actually run the detection, detect all of the objects and then take edge objects. So here, for instance, we want to exclude anything touching the edge because we’re looking to count these RNA ish spots.
So we don’t know if half the cell is missing, if those missing spots are over there, or if they’re not. So here, this is why we like to exclude these edge objects. And you can see by overlaying them as an annotation, now it’s very, very clear to people that these have been actively excluded from the analysis. We don’t have to worry that the app has missed them.
You can see here that there’s one cell that is in fact not on the edge and I’ve also used this process of subsetting the cells into positive and negative or edge objects and correct objects to exclude artifacts. So there’s this huge blob here. I don’t want to include that in my analysis. So I’ve also excluded that.
I’ve marked it as an ROI and you can see that when I come to do my outputs I’m only measuring labels.
So here it actually doesn’t matter whether or not these are outlined as annotations or not because they’re all right there.
So just a couple of quick points to identify here is that in order to create these annotations we can actually just use a couple of simple post processing steps. So if you’re not familiar with the edge object exclusion, I’ll just mention that very briefly because it’s a useful general purpose post processing step. Here we use change surrounded, Normally this might be used for classifying cells based on subcellular structures, but in this case we’re taking the initial detection object, these yellow objects, and then we’re saying surrounded by a special class. Now this is up at the top of the list and this is image border. So this simply says if the object is touching the border with at least 5% of its perimeter then subset it into a different label in this case called excluded.
Once we have those excluded labels we can then just use another post processing step right down at the bottom outline as annotation and this is how we can convert labels directly into annotations. So here we’re taking confusingly a label called excluded and converting it into an annotation called excluded. This is annotation number five, which is that magenta one.
The last thing to make sure you do, of course, is to then take those excluded labels and just remove them. That way if you’re doing an analysis across all of the cells, you’re not including those in your outputs.
So with those simple steps you can start to apply these kinds of tips onto your workflows.
Another case where this is quite useful is actually within RNA ish analysis.
So if you can imagine doing an analysis in this case I have a LUNAR-four comet image where we have four RNA markers and about 13 protein markers. It’s a lovely data set, but actually coming in and then trying to identify overlapping markers in the different colors of RNA can be quite difficult if you’re solely using labels. Each time the labels will overwrite each other.
In this case the process is very similar to the one I showed you before where we can actually come in identify each of the spots and then through that workflow once they’re identified outline them as annotations. So here we have four different flavors of annotation one for each of the different RNA markers And don’t forget, since recent update, you can also then go in and use the overlay plotting tool that’s now available from view overlays to actually control the visibility of all of these different species of RNA. So now we can turn on and off the different markers, we can get a review of how many spots there are in total, and then we can go a lot further with this once we start plotting or doing phenotyping and other things using these markers. But really, it’s just the ability to then identify all of these that is a really, really nice approach.
Okay, so with that in mind, let’s move on and talk a little about cell segmentation. So, again, the problem just to highlight this is that when we come in and do nucleus based segmentation for many, many applications this works really well. You’ve got a quick start app that’s able to jump in and then manage to do object detection on pretty much all of the cells that have DAPI signal in them, whether or not they’re large and tumoral, like the ones in the bottom left here, or small immune cells or other stromal cells over here.
The problem I highlighted before, as you can see, actually twofold here. One is that each of these outlined labels doesn’t really match the boundaries of that existing cell here. So in this case, this cell the boundaries you can see with this pan keratin marker are actually not really aligned with the label itself.
The second problem, which is nicely highlighted here, is that for cells that do not have nuclei, then these are not detected because all the app sees is that DAPI input channel doesn’t have a chance to identify these. So this could be a problem with tumor cells, sometimes it’s a problem with macrophages or other cell types.
So you can use for instance pan keratin and DAPI together. This is what we mean when we start to talk about things like membrane aware cell segmentation.
So here I’m going to talk in a little more detail about how we’re going to create these annotations.
The first thing to remember is that when you’re creating annotations for multi marker inputs you really need to look at your images and then try to understand the variants that you see. Not all cells will be positive for all markers.
So here for instance in this PhenoImager image we’ve got cells over here in the stroma that are just DAPI positive and then we have cells over in the tumor that are both DAPI plus Pan Keratin. So just like building any other Visiopharm app, you really need to identify these different regions and then be able to provide training annotations to capture that variance.
Now I’m a big fan of working smart and as I said we already have tools to be able to do cell detection in DAPI alone. So normally what I’d recommend for people initially is draw an ROI and then run the off the shelf quick start app in order to identify individual cells. The only change that I made here is to add on this boundary condition. So this is just a simple dilation Each of the cells are then dilated by about three or four pixels which creates that red label. Now if you’re not familiar with why we use a boundary label feel free to reach out to supportvisiopharm.com and they’re happy to guide you through that. It’s a really, really smart way to be able to handle very dense cells, overlapping cells and other tricky cell shapes. It’s quite a common method and it’s used throughout all of Visiopharm’s cell segmentation apps and also some that are not related to cells but where you have discrete objects that are clustered.
So once we have this, that’s half the job done for us already and now we come to the other part and this is really where I wanted to focus for a couple of minutes because I think a lot of people come to this task and actually find the concept quite difficult to conceptualize how to even begin with this. So, you know, it’s something that people might want to do is to come in and then start to draw the boundaries of these cells like this and that’s great until you start to overlap them. And then because of this point that I initially raised about overlays, now these two are merged objects. But
that’s okay, we can go in and maybe draw the boundary layer around the outside and try to identify where the edge is. This is okay. But the process that we tend to recommend in Visiopharm for doing this kind of annotation when you have a really dense cell area is just to take the whole area and label it as your cell marker. So in this case this is label two.
This is going to represent our cells in the final app. And then all we’ll do is actually come in, you can put on some good music and get a tablet to do this and just start to annotate along the boundaries here. So we’re just going to start to build up where those boundaries lie. I’m not going to sit and watch you or have you watch me do the whole thing, but just so you get an idea of how this looks, you can come in and then you can start to find all of those annotations.
The really nice thing about this approach is that you don’t have to worry too much about getting it perfect. As long as you get the vast majority aligned with your marker, this is absolutely fine.
The other thing I would say here is that when you have areas like voids or other problems, if I just jump to one that I’ve already created here, you’ll see the same area that’s now been somewhat completed here.
You’ll probably find areas within this that actually are not cells. So maybe there’s a blood vessel there, maybe there’s a tear or void or something else. You can see one over here on the left hand side of this piece of tissue.
So now what you can actually do is use a really helpful shortcut in Visiopharm, which is to select your label of interest. In this case, I want them to be background if there’s any voids. And then by holding down the control key and then clicking, I can actually turn any of these into background. Now these are not background these are cells but just as a quick example you can click and then turn these into background. If there’s a gap in the boundary as you see here it’ll do both. Great example to point out the undo queue that allows you to go back and undo anything that you click and then you undo. That’s control Z or you can use the little undo arrows up in the quick menu.
So when you have this you basically have an annotation data set. Remember we want to capture the variance across both of these different areas about these different markups. So let’s have a quick look at what that app looks like.
Now I would always recommend people start with a quick start app if you can. In this case we can then come in and then pick the nucleus detection in AI as a framework of the app and pretty much everything up here is going to stay the same. I am going to change the name so this becomes cells. Our input is going to stay the same we want a nice high magnification so we can outline the membranes really tidily.
Classification is important here because now what we need to do is actually specify which one of the inputs we’d like to use. So we’ll get rid of the existing inputs and then we will add in both DAPI and Pan Keratin as two of our inputs directly here.
Now if you have more markers you can add these in. If you’re interested in doing really generalizable apps you can take slightly different approaches. Again happy to talk about that in the Q and A if people of interest, but pretty much everything else can stay the same here. Now that we’ve selected our two input markers, now you can just hit train.
Now there’s one other important point to make about this when you are training a deep learning app in order to do cell segmentation as opposed to nucleus segmentation. And that’s because the vast majority of the pixels that are represented here are indeed cells. We need to be really, really careful or aware of what’s going on in post processing and by that I mean the separation of objects.
So here if you’ve ever dug into one of these cell apps you’ll know the importance of the separate object step.
Now here this is taking anything that is a larger object than you would expect for the cell size that’s defined and then splitting it into smaller objects.
Now the area of interest is actually down here which is this object heat map and here what we’re doing is effectively using the deep learning feature from this red label that’s the boundaries of all of the cells to help with the cell separation.
This will use that heat map and that probability map to do a really efficient split and a really efficient separation of the cell objects. So if you don’t have this set and usually when you retrain this will go back to don’t use’ always come back in here and then select your boundary class using that. Again if you want more details on that feel free to reach out to supportvisiopharm.com and someone will be able to walk you through on your own data set to really explain how that works and how that happens.
Now, the last thing I will say is just it’s really important to understand that this process of annotation, this process of creating the different regions that you have is relevant not only to cells but also to anything where you have those defined shapes.
So sometimes we see this in the retina where you have this lovely picket fence outline of certain cell types. We see in muscle fibers if you’re doing identification of cross sectional cut muscle fibers, same concept. You want to identify the fibers and you want to create that laminin boundary or something similar to that.
So all of this really allows you to build an app that is really membrane aware or is at least aware of the outside of the cell And this can lead you down the road of having a much more accurate cell segmentation, which then can run into more accurate phenotyping, more accurate classification, and more accurate identification of your cells in the end.
So these are the main topics that I think we wanted to cover today.
We were interested or at least people gave feedback that they wanted a little more detail on certain types of annotations and overlays, that they wanted guidance on all of this. Thank Thank you so much to the people who have actually provided these questions. I look forward to hearing any questions you have in the chat. Please go ahead and add those in. And of course, if there’s any other questions you would like to see in a further Tech Talk, please don’t hesitate to get in touch and suggest those to us. We’re always happy to get that feedback.
So with that, I look forward to the Q and A and let’s see if we have any questions that have come in. Bettina, did you see any questions that have arrived?
So far I have not seen a question. Please just add anything to the chat. So here we go. You showed PCK and DAPI. Can you select multiple markers as well as input? CDA, CDA68, etc.
Yeah, it’s a great question. And I sort of alluded to this during the last piece of the talk. Oftentimes people will want to throw everything at the wall and really see what sticks. I will just jump back into software to answer this question briefly.
All I was saying is that when we’re adding the inputs, I added Pan Keratin, I added DAPI, you can add as many inputs as you like via this. But actually in a recent version of the software, we actually now have the ability to add multiple inputs to the same channel. So this is actually creating a sort of an averaged version of all of those inputs. If you’re after trying to create a very generalized focus of the app this might be a great way to do that.
So we have another question. Could you have both training annotations and a model that performs well in both Pan Keratin positive and Pan Keratin negative regions?
Yes, I believe the answer is that you can and I can actually show you the output of the app.
So if I take for instance the same image that I’ve been using and show you the same version highlighting another feature that some of you may not be aware is this multi view mode which is made with the the alt key. So here you can see I’ll turn the ROIs off that actually we’ve run on the left off the shelf quick start app and on the right we’ve actually run this Pan Keratin version. And here because we’ve provided annotations in both the DAPI alone and the DAPI plus Pan Keratin you can actually do both in the same app. So, it doesn’t have a problem detecting this and this is true if you have CD68 positive and CD68 negative for instance if you want to detect macrophages. As long as you include the channels that can be used to identify each of the different populations so tumor cells, stromal cells, that’s not a problem at all.
Excellent, sounds good. So we’ve got another question coming in: Can you show what the result of the app you just trained detects after the classification step?
Yes, absolutely. So one of the things I love is this ability to preview every single step of the way. So if I take this image again, let me just get rid of my existing annotations. I’m gonna go into here and multiplex.
Quite a lot of apps with Pan Keratin.
So if I just come into here, open up the app, and I’ll pick an area that has both, individual regions, so we can come in here and then just preview. That’ll do the whole thing so we can see the outputs, and then I’ll step back and just get the classifier.
So it’s just running on my laptop, so it’ll take a second. So this is the output with all the post processed images. And then when I run just the classification, this is what you can see. Let me just fill in the cells.
So a couple of things you notice is that one, the boundary class reacts really well when we have pan keratin and we don’t have pan keratin. It’s able to pick out a lot of those boundaries really, really nicely. And I think in the example we gave before, it’s not in this area, but it will also handle a nuclear cells because it’s looking at both the pan keratin and the DAPI signal. I hope that’s okay.
After the classification step, I guess for completion, I can just highlight very quickly each of these steps. So, is just removing the two labels we don’t need to leave only the cell detection label. The separate objects here will then clean up all of these touching boundaries. We can then dilate and remove those boundary fences, do a small size exclusion, and then apply accounting frame. So these are the same steps that you see in any of the Visiopharm cell detection apps. So anyone with access to the Quickstart apps can go in and then tease it apart on your own data, try to understand those steps that we take.
Okay.
So there’s another question here on the same kind of topic. Can I use the boundary class to dilate inwards as another class and then change the class on the presence of a detected class? Brilliant question, exactly. So effectively, is an extension of this idea of building membrane detection apps is not only do I want the whole cell detected accurately, but I want to compartmentalize the cell.
So a really easy way to do that is actually just to take our existing object and then dilate it sorry erode it in by a set number of pixels. So here if I just take exactly the same step, now we’ve taken those gray objects and then just eroded them in with this red label. So now if you wanted to measure the sort of main cell body, you wanted to measure the membrane signal, you can even do ratios so to calculate what is the ratio of the signal on the membrane to the entire cell or to just the cytoplasmic. So anything like that you can use to classify the cells in the app or you can pipe into phenoplex if you want to do this across a larger data set and then classify the cells.
There was one quick question there about classification of the cells so here because this is just a label we can then just step in and then classify the surrounding label, so classify the membrane compartment or the nucleus and then use a change by covered objects for instance to re merge the entire cell. So once you have those labels you completely have the choice about how you classify them or how you measure them.
Question about continuing training all steps in post processing need to be checked or just some of them need to be checked?
So continue training is basically used when you have a pre built app, maybe you have built it or maybe Visiopharm has built it and then you want to refine that app, but you don’t want to start training right from the beginning again. This is a really nice way that people can take Visiopharm’s Quickstart apps for instance and then use them sort of out of scope.
So if you take an app that has been trained on say five different tissues but you want it to run on a sixth, you can create some annotations in the same way that I showed in the software and you can continue training.
The important thing is that nothing below the classifier tab in the app author actually has any effect on that. So here, if you wanted to create some annotations, you can just create those annotations on your own data, maybe on a couple of different images just like I’ve done here, and then hit continue training. And the status of these steps makes no difference at all.
These will always process after the fact. So an app runs kind of top to bottom, setting the magnification, running the classifier, and then refining any outputs with the post processing steps, followed by calculation of output variables at the end.
Hope that clarifies. If that doesn’t answer your question please feel free to comment again or we can follow-up after the fact. There’s a question about object separation, about how we can do that in yeah I mean so the best thing with object separation is to try to capture the variants, to capture the really accurate annotations where you have things like overlapping cells. Something like there are areas of this tissue, in fact there’s quite a lot in this tissue, where many of these cells, many of these nuclei are overlapping.
So here if I just turn these labels off, you can see here that every pixel top to bottom of these two nuclei is going to be blue. Right? So all of these are cell pixels. So, relying on that boundary class is really important to accurately split these kinds of situations. And it’s true with cells with very complex shapes as well. Things like I keep mentioning macrophages, they’re kind of a pain to work with, but you can use this approach to build tools that work very nicely with this.
And just to follow-up on that continue training step, you can keep all the settings and then continue training.
The best thing to do if you are going to continue training is actually to make a copy of the app. They’re very small files. So here you can just keep creating as many copies as you want. I would recommend some sort of clever numbering system in order to keep them in order, you can identify which is which, but this will allow you to always keep a copy so that if the training requires some different annotations or you want to start again, you can do that.
Is it possible to export a trained model O and NX format?
Open Neural Network Exchange. Not today, but it is something that is being worked on for future developments. So the open neural network exchange and updates to the Visiopharm backend in theory will allow for reading in and exporting ONNX models.
How do you delete apps? I have lots of edited apps.
Yeah. So two ways. One, you can just, if you remember, the apps are always, available via this, app selection dialogue up here. So just by clicking on the name, the same place you would go to go and open them. If you just click on an app here and then hit delete, you can just delete them directly from this interface.
That’s one option. The alternative is to remember that they are just, stored on the hard disk, so you can go and find your apps directory. One quick way to find that is just to go to the save dialog and you’ll see an explorer button.
So here you will then be able to open up your apps directory. Again, normally, it’s in program data Visiopharm, and then a folder called configurations. Your specific path might change. But in this case, you can just deal with these.
These are just folders that will then match the list you see within the software. So this is also an important thing to know because if you’ve spent a long time building apps, you probably will want to back them up. You might wanna share them. You might wanna publish them with a scientific paper.
And then this allows you to access them. So any save made here, any change made here, just copying the files for instance, will then show up when you come to identify them in software. It’s pretty immediate.
Excellent.
Got another question coming back to the first question about the input channels. What’s the difference between selecting them on two separate lines with combining them?
Yeah, so putting them on two separate lines is important when each one has reasonably equal weight. So if you have something like the Pan Keratin and DAPI version that I’m talking about, then you can put them on one line each as one input each.
Now in those cases every single time we run the app we need to have those two biomarkers present in the panel. So if you imagine creating an app that uses five or six biomarkers, now all of a sudden those six biomarkers, if you add them as individual inputs, all have to be present within the app whenever you run it.
What happens with this new approach of merging is in fact when you create these outputs where you have many selected together, now what you’re doing is effectively creating a mean of those input channels. So it will merge, for instance, CD8, FOXP3, CD68, and PD1. Now if you come to a panel and you do not have one of those biomarkers, let’s say you don’t have CD68, well because you’re creating an average the CD68 signal being a membrane signal will look similar in some ways to CD8. So actually the app has more generalizability when you merge the individual channels, when there’s a chance that those channels may not be present in all cells or in all data sets.
There is also some other reasons around pre weighting of our networks. Anyone who has access to the architect tools or the pro tools will have access to this freeze depth bar. This is really critical when you come to retraining because it allows you to control how much of the neural network is actually modified during training.
So here, for instance, if we start adding new inputs beyond four, if I just add an extra one in, you’ll see that the freeze depth hits zero. That’s because our networks are pre weighted for three input channels, not four. So we can’t use those pre weightings. It’s not a problem to train an app, but it means it’s going to take longer to converge, it will take longer to train the app in order to get there. So that’s another great reason why we might want to combine these, but generally speaking you can think of it more as combining compartment specific signals as opposed to biomarkers. Put your DAPI or put your nucleus signals in one input, put your membrane in another, maybe put cytoplasmic in a third, and that gives you that ability to build these generalizable apps.
I think the next question is from Kevin. In your demo, you shot the overlay highlighting different annotations and you can turn different classes off visually. Can you manipulate, delete all ROIs or annotations of a certain class I only delete them using the trash can icon in the layer section.
Yeah, so one of the easiest ways if you want to do this manually, of course you can do this in an app, is actually to use tool that’s available either on the wheel if you’re still using an older version, you right click and then select up the drawing dialogue, or on the newer versions of the software. There’s a really nice tool here for change.
So if you would like to, for instance, remove all of ROI five from the image, you can do ROI five and convert it into clear or convert it into a background ROI depending on your tissue structure. So if you hit this, this will then convert all of the ROIs. You can do this with labels and annotations as well, and you can even do it across class. So you can take all labels and convert them to ROIs. This is quite a nice way to handle individual types, and you can also do this kind of conversion on an object level through that overlay browser that we explored earlier.
Next question is on segmenting of the RNA signal working with annotations. What’s the sequence of work?
Yeah, so the sequence of work, or at least the workflow for doing this kind of analysis, is usually to take again, it’s a little bit backwards in terms of the typical Visiopharm approach where we start big with tissue, then we get smaller into tumor and smaller into cells and smaller into RNA.
In this case, the recommended approach, at least from my perspective, is to do tissue segmentation if you want. You can do tumor stroma for instance, and then to do spot detection. So go through running an app to detect each of these spots individually and then only afterwards do you come in and then do cell segmentation.
And there’s a couple of reasons why that’s actually a really beneficial approach.
The first is that you can tune each of the apps for spot detection to your particular probes. RNA can be really variable in terms of its signal, terms of its background. Maybe you want to use a deep learning app to do that. Maybe you want to use a threshold.
Maybe that’s fine. Maybe you wanna take a third approach. But you can do that specifically for each of the individual markers. So the workflow, would say, is to do detection, run your spot detection, turn those spots into an annotation, keep those into a specific class.
You can see four different colors here, and then you run the cell segmentation at the end.
So the nice thing about doing the cell segmentation at the end is that then this allows you to gather all of the spots.
And again, just for the sake of completion here, the key part is really to do output variables like this. So we’re calculating the count of annotations instead of labels, and here we’ve got my four different annotations selected here, and we’re doing this based on all objects as labels. So this defines the label as the cell or at least the group and then counts all four of the different classes, as well as things like the multiplex intensity. Again, if you’re interested in a bit of a deeper dive into approaches for RNA, you can check out our LMS, so the learning management system, online training. There’s a whole course there about RNA spot detection and handling multiplex data, as well as these kinds of outputs or reach out to support and they’ll be able to help you with that.
Excellent. So one more question. Can you talk about general strategies for detecting cells which co express two or more different fluorescence markers?
Yeah. So in Visiopharm, you know, we give you that flexibility. So it’s always a choice as to how you approach a problem. If you only have two markers and if they’re individuals, can very easily take an app for cell segmentation here and then add in change by intensity steps.
So this allows you to build a decision tree around marker A positive negative and then marker B positive negative. You can do double positives or, you know, rename all of these different classes.
This is really simple. Mean in Visiopharm we always abstract, or at least we almost always abstract, object detection from object classification. The object detection is done with the classifier and then the object class The object detection is done with the classifier. The object classification is done either with post processing steps like this, or with the phenotype tool, the guided workflow for Phenoplex.
So different tools are beneficial for doing different things. You know, if you’re doing broad strokes, checkpoint marker detection, or if you’re doing metabolic marker panels, all of these kinds of things are maybe better suited to Phenoplex. Whereas if you only have maybe one or two markers you can then start to use these types of tools to scale up your analysis using an app based approach. In either way the outputs are the same and they really get you to much the same approach.
Okay, one more question. Are there plans for an MCP server integration so that I can ask Claude to help me do things with this?
That’s the big question these days, isn’t it? Can you do agentic analysis with Visiopharm?
Visiopharm has been moving with the market since its inception over twenty five years ago or so.
We adapted when multiplex technologies came along. We’re still adapting today.
And I think this is perhaps a logical next step. This is certainly something that our R and D team is talking about today. And we’re happy to arrange a call with the science leads in Visiopharm to get feedback on how people actually want to do this. But I think it’s certainly a possibility.
No more questions, it seems.
So I just wanna tell everybody please, stay tuned for our next Tech Talk webinar. We’re currently fixing the date, so sign up for the newsletter. Follow us on LinkedIn to be the first to know.
And also, have a webinar up next week. We have Anita Srivastava showing, the Visiopharm image pipeline that she has with two use cases in hepatology.
So don’t miss that and we’re happy to see you at the next webinar.
Thank you everybody and have a good rest of the day.
Thanks David. Bye bye.
In this Tech Talk webinar, David Mason, PhD, Global Director of Technical Sales at Visiopharm, provides a technical deep dive into advanced software features. The presentation begins with a recap of the three main types of overlays in the Visiopharm software: ROIs, labels, and annotations, explaining their distinct behaviors and use cases, such as excluding edge objects in HER2 FISH analysis or managing overlapping RNA markers. The session then transitions into a detailed discussion on cell segmentation, specifically focusing on building membrane-aware applications. Maison demonstrates how to use multi-marker inputs, such as DAPI and Pan Keratin, to create more accurate cell boundaries and handles complex scenarios like dense cell areas and overlapping nuclei. The webinar concludes with a Q&A session addressing technical queries regarding multi-channel inputs, training model refinements, and RNA analysis workflows.
David Mason, Ph.D
David Mason is a Global Director of Technical Sales in image analysis supporting Visiopharm’s UK and European Sales team. Trained as a Cell Biologist and Microbiologist he has spent over a decade in Academia specializing in Light Microscopy and Digital Image Analysis.